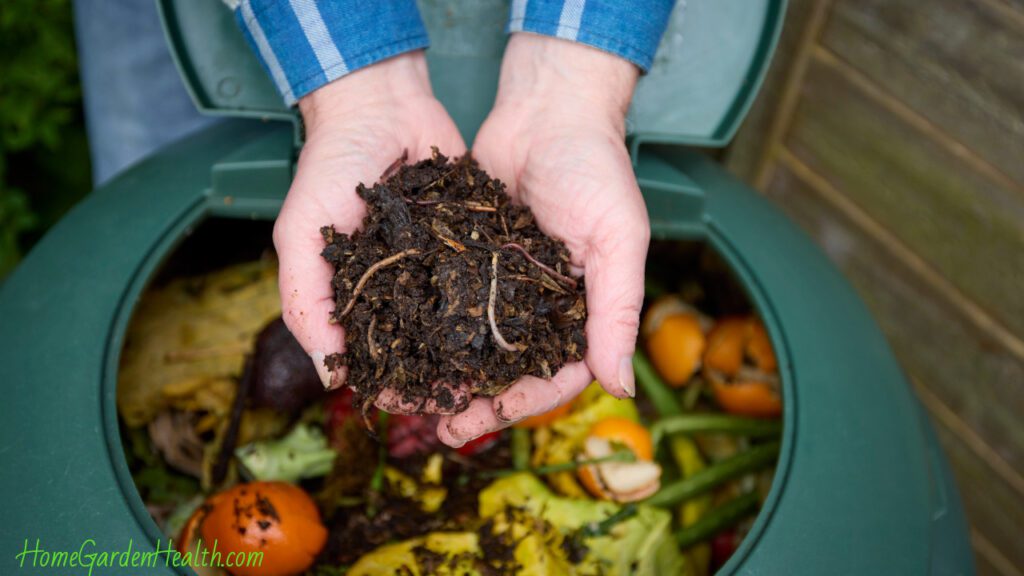
Composting is a natural process that transforms organic matter like leaves, vegetable scraps, and coffee grounds into a valuable soil conditioner called compost. By composting, you speed up the decomposition process, converting kitchen and yard waste into nutrient-rich compost that can improve your garden soil. This method reduces the amount of waste sent to landfills while providing a sustainable way to nourish your plants.
Beyond reducing waste, composting significantly enhances soil health. The decomposed organic material enriches the soil with essential nutrients such as nitrogen, phosphorus, and potassium, which are vital for plant growth. Additionally, composting fosters the growth of beneficial organisms like worms and bacteria. These organisms aerate the soil, break down organic materials, and convert them into a form that plants can easily absorb. Their presence also helps suppress plant diseases and pests, creating a healthier garden ecosystem.
Composting improves soil structure and moisture retention, reducing the need for frequent watering and helping plants thrive during dry periods. Using compost reduces the dependency on chemical fertilizers, which can be harmful to the environment and costly. Whether you have a large backyard or a small balcony, composting is an accessible and impactful way to support a healthier garden and a more sustainable lifestyle.
Choosing the Right Composting Method for Your Home
Selecting the appropriate composting method depends on factors like the amount of organic waste you generate, available space, and personal preferences. Understanding different composting methods can help you choose the one that best suits your needs.
Traditional Composting:
Ideal for those with ample outdoor space, traditional composting involves creating a compost pile or using a bin to collect yard waste, kitchen scraps, and other organic materials. Maintaining a balance of green (nitrogen-rich) and brown (carbon-rich) materials is crucial. Regularly turning the pile to aerate it and adding water as needed will help speed up the composting process.
Vermicomposting:
Vermicomposting uses worms, typically red wigglers, to break down organic waste into high-quality compost known as worm castings. This method is suitable for those with limited outdoor space, as it can be done indoors or in small containers. Vermicomposting is low-maintenance and produces compost faster than traditional methods, making it ideal for apartment dwellers.
Tumbler Composting:
Using a rotating compost bin, tumbler composting makes it easy to mix and aerate materials. This method is convenient and user-friendly, eliminating the need for manual turning with a pitchfork. Tumbler composters are often enclosed, helping retain heat and moisture and accelerating the decomposition process.
Bokashi Composting:
Bokashi composting is a fermentation process that uses inoculated bran to break down organic waste, including meat and dairy products. Done in a sealed container, this method is suitable for indoor use and produces a pre-compost material in a few weeks, which can be buried in the soil or added to a traditional compost pile for further decomposition.
By understanding the different composting methods, you can choose the one that best fits your living situation, waste output, and gardening needs, turning organic waste into valuable compost.
Essential Tools and Materials for Home Composting
Starting a composting system at home requires a few essential tools and materials to ensure the process runs smoothly and efficiently.
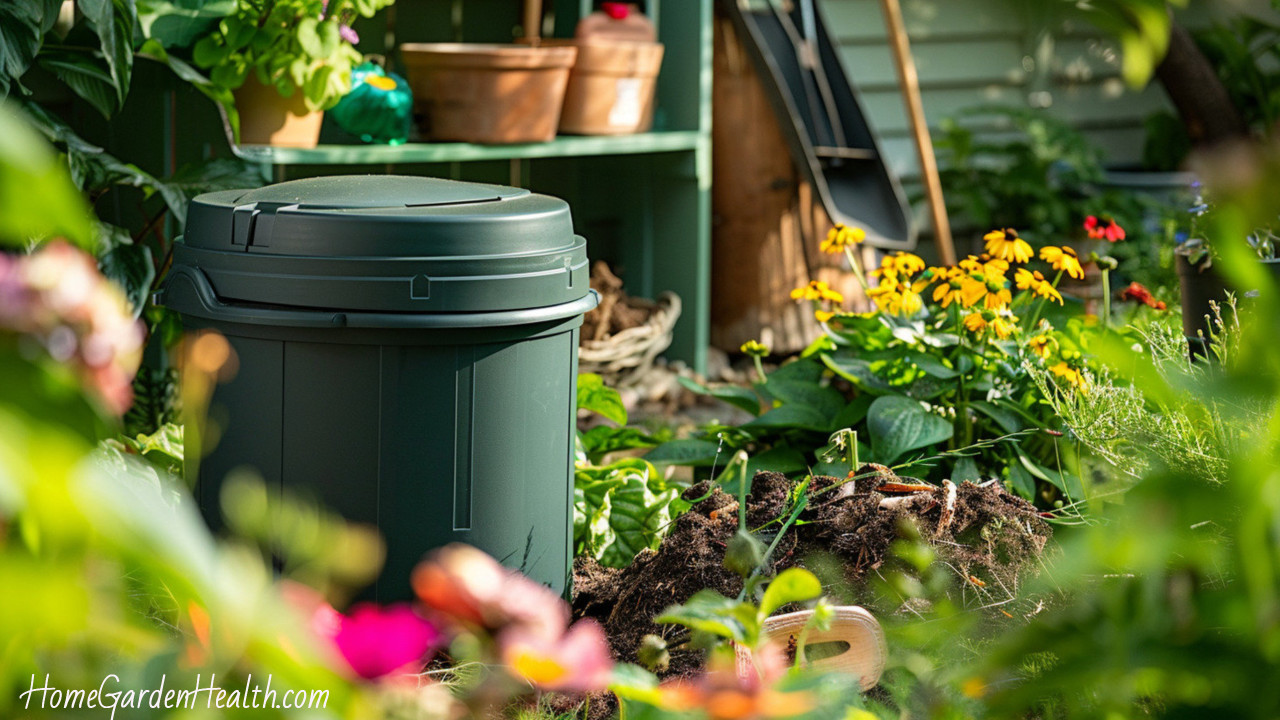
Compost Bin or Pile:
The first thing you’ll need is a place to compost. This can be a simple pile in your yard or a specially designed compost bin. Bins come in various styles, including stationary bins, tumblers, and worm bins, each suited for different spaces and waste amounts.
Aeration Tools:
Aeration is crucial for maintaining a healthy compost pile. Tools like pitchforks, compost aerators, and turning tools help mix the materials, ensuring they receive enough oxygen. Regularly turning the pile promotes aerobic decomposition, speeding up the composting process.
Shredder or Chopper:
Breaking down organic materials into smaller pieces accelerates decomposition by increasing the surface area for microbes. A garden shredder is useful for processing larger items like branches and leaves, while a kitchen chopper can help cut down fruit and vegetable scraps.
Moisture Control:
Maintaining the right moisture level is essential. Use a compost thermometer and moisture meter to monitor conditions inside the pile. The compost should be as damp as a wrung-out sponge. Add water if it’s too dry or brown materials if it’s too wet.
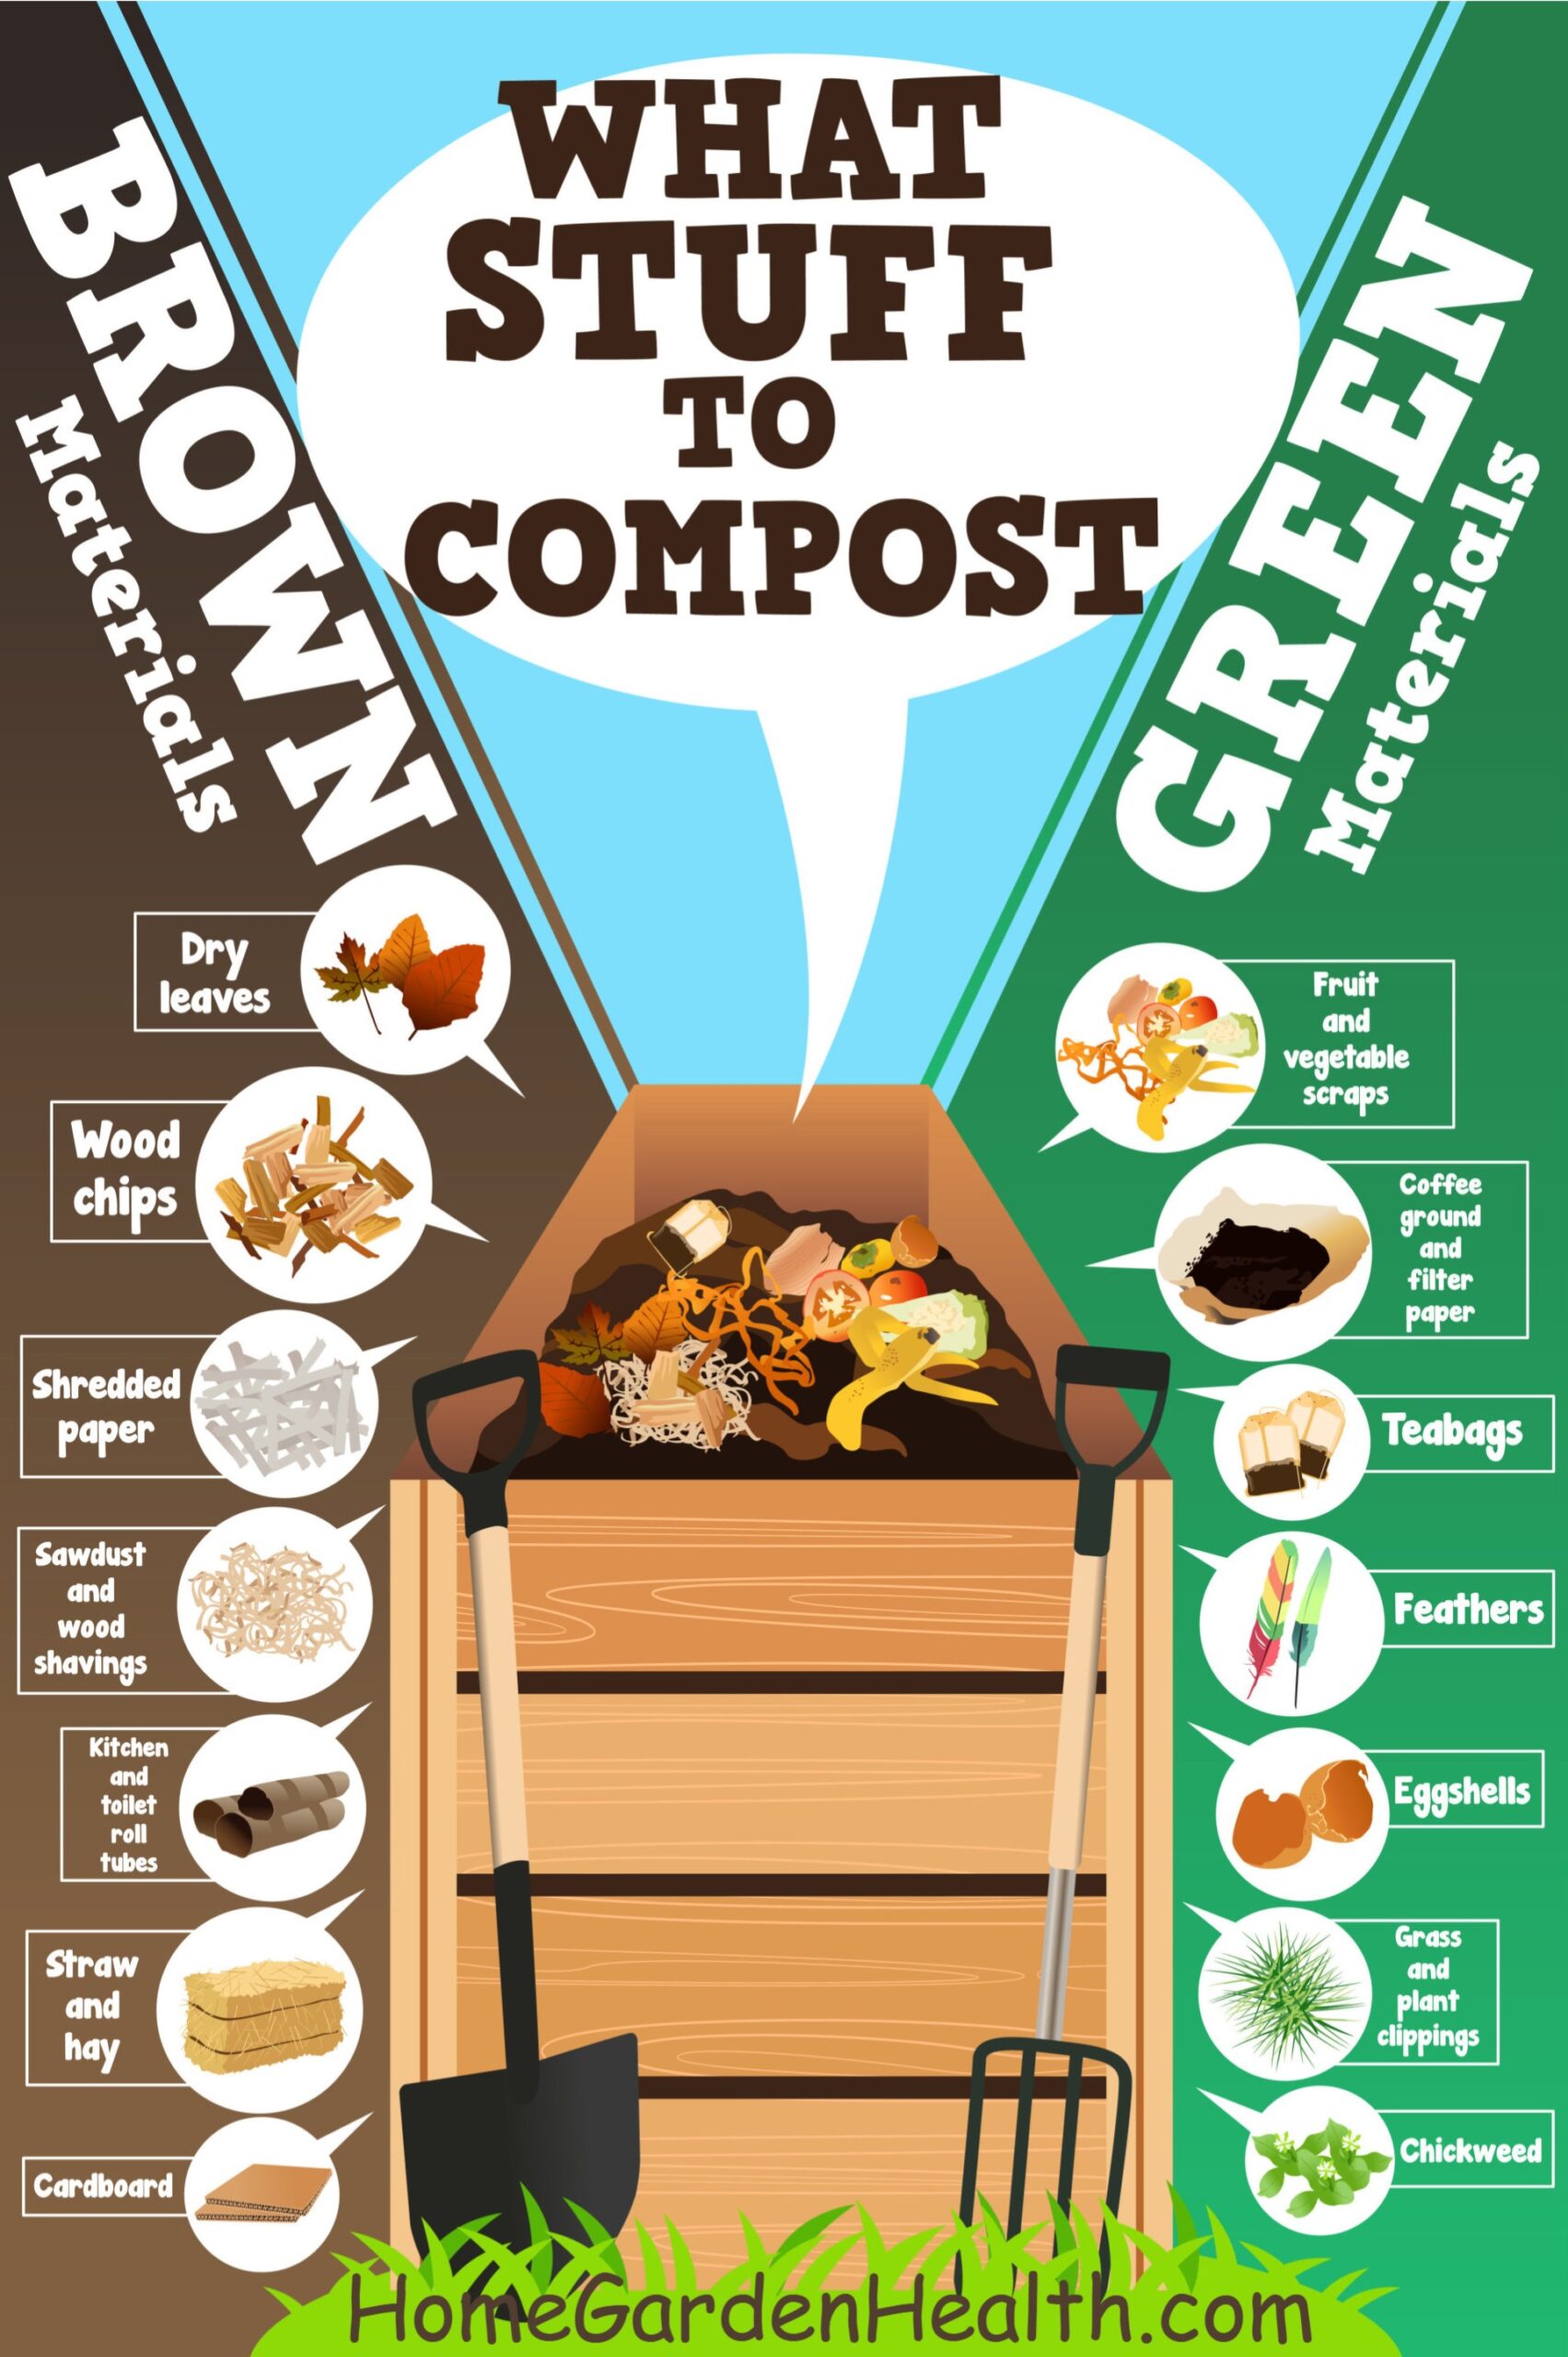
Brown and Green Materials:
Collect and store brown (carbon-rich) and green (nitrogen-rich) materials separately to maintain the right ratio in your compost pile. Browns include dry leaves, straw, cardboard, and newspaper, while greens include kitchen scraps and grass clippings.
The ideal ratio for brown and green materials in composting is roughly 3:1. This means three parts brown materials (carbon-rich) to one part green materials (nitrogen-rich). Maintaining this balance helps create the optimal environment for microorganisms to efficiently break down the organic matter, resulting in a healthy and productive compost pile.
How to Achieve the Right Balance
Layering:
Start with a layer of coarse brown materials like straw or small branches to aid in aeration. Follow with a layer of green materials, then another layer of browns, and so on.
Mixing:
Regularly mix or turn the compost pile to ensure the materials are well-blended and to introduce oxygen, which is crucial for aerobic decomposition.
Monitoring:
Keep an eye on the compost pile’s moisture and temperature. The pile should be as damp as a wrung-out sponge. If it’s too dry, add water or more greens. If it’s too wet, add more browns.
Adjusting:
Depending on the pile’s condition, you may need to adjust the ratio. If the compost pile smells bad or is too wet, add more browns. If decomposition is slow and the pile is dry, add more greens.
By maintaining the 3:1 ratio of browns to greens and regularly monitoring and adjusting the pile, you can create a balanced, efficient composting system that produces rich, nutrient-dense compost for your garden.
Compost Temperature
For optimal composting, the internal temperature of your compost pile should ideally be between 135°F and 160°F (57°C to 71°C). This temperature range ensures that the composting process is efficient and effective, promoting the rapid breakdown of organic materials while killing off weed seeds and harmful pathogens.
Temperature Phases of Composting
- Mesophilic Phase (50°F to 113°F or 10°C to 45°C):
- This is the initial phase where mesophilic microorganisms (those that thrive at moderate temperatures) start breaking down the organic material. This phase lasts for a few days.
- Thermophilic Phase (113°F to 160°F or 45°C to 71°C):
- As the pile heats up, thermophilic microorganisms take over. This phase is critical for rapid decomposition and sanitizing the compost by killing pathogens and weed seeds. The pile should stay in this temperature range for several weeks.
- Cooling Phase (Down to 50°F or 10°C):
- After the thermophilic phase, the temperature will gradually decrease. Mesophilic microorganisms return to finish breaking down the more resistant materials.
- Curing Phase:
- The compost continues to decompose at lower temperatures. This phase can last several months and results in stable, mature compost.
Monitoring and Maintaining Temperature
- Thermometer: Use a compost thermometer to regularly check the internal temperature of your compost pile. Insert the thermometer into the center of the pile where the temperature will be the highest.
- Turning the Pile: Regularly turning the compost helps to aerate it and distribute heat evenly. This practice also reintroduces oxygen, which is essential for maintaining high temperatures during the thermophilic phase.
- Moisture Control: Ensure the compost pile has the right moisture content. It should be as damp as a wrung-out sponge. Proper moisture helps microorganisms thrive and keeps the temperature within the optimal range.
- Pile Size: A compost pile should be at least 3 feet wide and 3 feet tall to retain enough heat. Larger piles are better at maintaining high temperatures but should still be manageable for turning and mixing.
By monitoring and maintaining the temperature within the optimal range, you can ensure that your composting process is efficient, producing high-quality compost in a relatively short period.
Having these essential tools and materials on hand will help you manage your compost pile efficiently, ensuring it decomposes properly and produces rich, nutrient-dense compost.
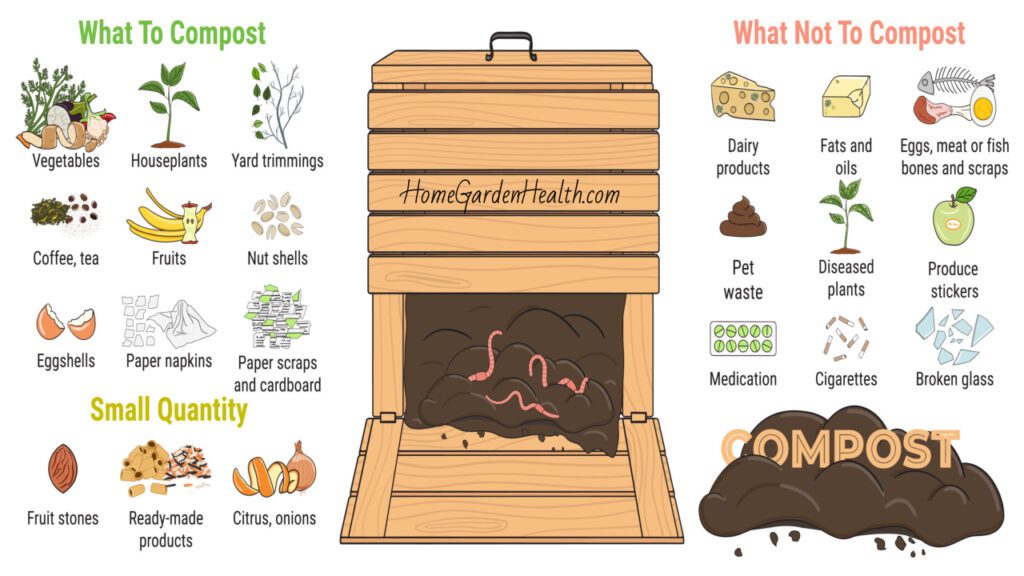
What Can and Cannot Be Composted
Knowing what materials can be composted is essential for maintaining a healthy compost pile. A balanced pile includes a mix of green (nitrogen-rich) and brown (carbon-rich) materials. However, not everything should be composted, as some items can attract pests, introduce pathogens, or slow decomposition.
What Can Be Composted:
Green Materials:
- Fruit and Vegetable Scraps: Apple cores, banana peels, carrot tops.
- Coffee Grounds and Tea Leaves: Include filters and natural fiber tea bags.
- Grass Clippings: Fresh and high in nitrogen.
- Garden Waste: Plant trimmings, spent flowers, dead plants (if not diseased).
- Eggshells: Add calcium, though they break down slowly.
- Manure: From herbivores like cows, horses, rabbits, and chickens.
Brown Materials:
- Dry Leaves and Straw: High in carbon.
- Paper Products: Shredded newspaper, cardboard, paper towels (without heavy inks/coatings).
- Wood Chips and Sawdust: Untreated wood only.
- Egg Cartons: Cardboard types.
- Nut Shells: Though they take longer to break down.
What Cannot Be Composted:
- Meat and Fish Scraps: Attract pests and produce odors.
- Dairy Products: Cause odors and attract pests.
- Fats and Oils: Don’t break down well and can create odor issues.
- Pet Waste: Can contain harmful pathogens.
- Diseased Plants: Risk spreading disease.
- Invasive Weeds: Risk spreading when compost is used.
- Chemically Treated Wood: Releases harmful chemicals.
- Synthetic Materials: Plastic, glass, metal, and other non-organic materials.
By following this guide, you can create a balanced compost pile that efficiently breaks down organic waste into valuable compost.
Step-by-Step Guide to Starting Your Compost Pile
Starting a compost pile is a rewarding way to recycle organic waste and create nutrient-rich soil for your garden. Follow these steps to set up your compost pile successfully:
Step 1: Choose a Location Select a convenient, well-drained spot in your yard with good air circulation. Avoid placing the pile near your house or neighbors to prevent odors.
Step 2: Gather Materials Collect green (nitrogen-rich) and brown (carbon-rich) materials. Greens include fruit and vegetable scraps, coffee grounds, and grass clippings. Browns include dry leaves, straw, cardboard, and shredded newspaper.
Step 3: Prepare the Base Lay down a layer of coarse materials like straw, small branches, or wood chips. This helps with drainage and aeration, ensuring the pile gets enough oxygen.
Step 4: Build the Pile Alternate layers of green and brown materials, each about 2-4 inches thick. Chop or shred materials into smaller pieces to speed up decomposition.
Step 5: Moisten the Pile Lightly moisten each layer with water as you build the pile. The compost should be damp but not soggy.
Step 6: Turn the Pile Every few weeks, use a pitchfork or compost turner to mix the materials. Turning introduces oxygen, essential for aerobic decomposition.
Step 7: Monitor the Pile Check the pile’s temperature and moisture levels. It should feel warm in the center. Add water if too dry or more brown materials if too wet.
Step 8: Harvest the Compost After a few months, the compost will be dark, crumbly, and smell earthy. Sift it to remove large, undecomposed materials.
Step 9: Use the Compost Mix it into garden beds, use as top dressing for lawns, or incorporate it into potting soil for container plants.
By following these steps, you can create a productive compost pile that efficiently recycles your organic waste and benefits your garden.
Common Composting Problems and How to Solve Them
Composting is straightforward, but it can sometimes present challenges. Understanding common problems and how to address them can help maintain a healthy compost pile.
Bad Odors:
- Problem: Foul smells indicate anaerobic conditions or material imbalance.
- Solution: Turn the pile frequently to introduce oxygen. Check moisture levels; if too wet, add more brown materials. Avoid meat, dairy, or oily foods.
Pile Not Heating Up:
- Problem: Lack of nitrogen, moisture, or volume.
- Solution: Add more green materials. Ensure the pile is moist but not soggy. Increase the pile’s size if it’s too small.
Compost is Too Wet:
- Problem: Excess moisture leads to anaerobic conditions.
- Solution: Add more brown materials to absorb moisture. Turn the pile to improve aeration. Cover during heavy rain.
Compost is Too Dry:
- Problem: Dry compost slows decomposition.
- Solution: Gradually add water while turning the pile. Add more green materials to increase moisture content.
Presence of Pests:
- Problem: Attracted by inappropriate materials.
- Solution: Avoid adding meat, dairy, and oily foods. Use a bin with a lid or fine mesh. Bury food scraps under brown materials.
Slow Decomposition:
- Problem: Improper balance, lack of aeration, or cold temperatures.
- Solution: Adjust the green-to-brown ratio. Ensure proper aeration by turning the pile. Insulate the pile in cold weather or move to a sunnier location.
Unwanted Weeds or Seeds:
- Problem: Can introduce unwanted plants.
- Solution: Avoid adding invasive weeds or plants with seeds. Ensure the pile reaches high temperatures to kill seeds.
Large, Undecomposed Materials:
- Problem: Finding large pieces in finished compost.
- Solution: Sift the compost to remove large pieces and return them to the pile. Shred or chop materials before adding to the pile.
By identifying and addressing these problems, you can maintain a healthy and efficient compost pile.
Using Your Finished Compost: Benefits and Applications
Finished compost is a valuable resource for gardeners, offering numerous benefits for soil health and plant growth. Here’s how you can use it and the advantages it provides:
Benefits of Finished Compost:
1. Nutrient-Rich Fertilizer: Compost is packed with essential nutrients like nitrogen, phosphorus, and potassium. Unlike chemical fertilizers, it releases nutrients slowly, providing a steady supply over time.
2. Improved Soil Structure: Adding compost enhances soil structure by increasing its porosity and water-holding capacity. It helps sandy soils retain moisture and nutrients and improves drainage in clay soils.
3. Enhanced Soil Microbiology: Compost is teeming with beneficial microorganisms that break down organic matter, cycle nutrients, and promote healthy soil ecosystems. This can help suppress plant diseases and reduce the need for chemical inputs.
4. pH Stabilization: Compost helps moderate soil pH levels, creating a balanced environment for plant roots and enhancing nutrient availability.
Applications of Finished Compost:
1. Soil Amendment: Mix compost into garden beds, flower borders, or vegetable plots to enrich the soil before planting.
2. Mulch: Apply compost as mulch around trees, shrubs, and garden plants. It helps retain soil moisture, suppresses weeds, and regulates soil temperature.
3. Top Dressing for Lawns: Spread a thin layer of compost over your lawn. This improves soil structure, encourages healthy grass growth, and helps prevent thatch buildup.
4. Potting Mix Ingredient: Use compost as a key ingredient in homemade potting mixes. Combine it with peat moss, perlite, and sand to create a nutrient-rich, well-draining mix.
5. Compost Tea: Brew compost tea by soaking a bag of compost in water for several days. Use the strained liquid to water plants or as a foliar spray.
6. Tree and Shrub Planting: Mix compost into the backfill soil when planting trees and shrubs to provide a nutrient boost and improve soil structure.
7. Erosion Control: Apply compost to areas prone to erosion. The organic matter helps bind soil particles together, reducing erosion and improving water infiltration.
8. Community and School Gardens: Use compost to enrich garden beds, support educational programs, and foster a sense of environmental stewardship.
By incorporating compost into your gardening practices, you can harness its benefits to create healthier, more productive soils and plants. Finished compost is a versatile and sustainable resource that supports a thriving garden ecosystem.