Are you tired of the same old boring garden setups? Do you want to add a touch of creativity to your outdoor space? Look no further than the DIY Vertical Pallet Planter! This ingenious idea not only adds a unique aesthetic to your garden, but also maximizes space by allowing you to grow plants vertically. Whether you have a small balcony, a limited backyard, or simply want to elevate your gardening game, this step-by-step guide will help you create your own beautiful garden wall using a pallet. Get ready to bring life to your outdoor space with the DIY Vertical Pallet Planter!
Why Vertical Pallet Planters Are Perfect for Small Spaces
Living in a small space doesn’t mean you have to sacrifice your love for gardening. With the trend of vertical gardening gaining popularity, DIY enthusiasts have found a creative solution that fits perfectly into cramped spaces – the vertical pallet planter. These innovative planters are made using old pallets, transforming them into versatile and stylish pieces that serve as a green oasis in your limited living area.
Vertical pallet planters are the ideal solution for those with restricted spaces. By utilizing the vertical wall space, you can maximize the number of plants you can grow without taking up precious ground space. These planters allow you to have a flourishing garden even in the smallest of apartments or tiny balconies. Whether you live in a busy urban environment or a compact studio, vertical pallet planters enable you to create a vibrant and lush green space where you can relax and enjoy the beauty of nature.
One of the main advantages of DIY vertical pallet planters is their versatility. You can customize the design to suit your preferences and needs. Add vibrant colors or keep it rustic with natural wood tones. Attach shelves to hold additional plants or incorporate herb pots for a functional and aromatic touch. The possibilities are endless, and with a little creativity, you can create a personalized vertical garden that complements your unique style.
Not just visually appealing, vertical pallet planters also offer practical benefits. They make it easier for you to tend to your plants, preventing unnecessary strain on your back and knees. With plants at eye level, you can easily water, prune, and harvest without the hassle of bending or reaching. Additionally, these planters provide better air circulation around your plants, ensuring they receive adequate oxygen to thrive and grow to their full potential.
In conclusion, the DIY vertical pallet planter is a game-changer for those looking to add a touch of greenery to their small spaces. Their space-saving design, customizable options, and practical advantages make them the perfect choice for those with limited room. So, unleash your creativity, transform that old pallet into a stunning vertical garden, and enjoy the beauty of nature right at your fingertips, wherever you are.
Materials Needed for Your DIY Vertical Pallet Planter Project
If you’re looking to add some greenery and charm to your outdoor space, a DIY Vertical Pallet Planter is a great project to tackle. Not only is it a fantastic way to upcycle old pallets, but it also maximizes your planting space. To get started, you’ll need a few key materials.
First and foremost, you’ll need a sturdy wooden pallet. Check in your local area for businesses or warehouses that are willing to part with their discarded pallets. Make sure to choose one that is in good condition and hasn’t been treated with any harmful chemicals.
Next, you’ll need landscape fabric or weed barrier cloth. This will prevent soil from falling out of the planter while allowing water to drain. It’s essential for ensuring the longevity of your planter.
You’ll also need a staple gun or hammer and nails to secure the fabric to the pallet. This step is crucial to keep the soil and plants in place.
Lastly, gather the potting soil and plants of your choice. Consider selecting plants that do well in vertical gardens, such as trailing vines, herbs, or succulents. Be sure to choose plants that have similar light and water requirements for easy maintenance.
With these materials in hand, you’re ready to get started on your DIY Vertical Pallet Planter project. Follow a step-by-step guide for assembly, and soon enough, you’ll have a beautiful and sustainable addition to your garden or patio. Happy planting!
Step 1: Choosing the Right Pallet for Your Planter
Planning to create a vertical garden with a DIY vertical pallet planter? The first crucial step is choosing the right pallet. Pallets are perfect for transforming into planters, providing a rustic and eco-friendly touch to your space. But not all pallets are suitable for this purpose. So, how do you ensure you choose the right one?
First and foremost, inspect the pallet thoroughly for any signs of damage or rot. Cracks, splits, or loose boards are a red flag. These can make your planter unstable and increase the risk of it falling apart. It’s also important to check for any chemical treatments or stains on the pallet. Choose a pallet that is untreated or only treated with non-toxic substances to ensure the safety of your plants.
Consider the size of the pallet as well. Do you have enough space to accommodate a larger pallet, or would a smaller one fit better? Remember, your plants need room to grow and thrive, so choose a pallet that provides enough space for their roots. Additionally, think about the orientation of the pallet. Will you be mounting it vertically or horizontally? Depending on your preferences and available space, you can choose accordingly.
Lastly, think about the material of the pallet. While wooden pallets are the most common choice, you can also opt for plastic or metal pallets. Each material has its advantages and disadvantages, so choose one that aligns with your aesthetics and practical needs.
Choosing the right pallet is the first step towards creating a stunning DIY vertical pallet planter. With careful consideration of its condition, size, orientation, and material, you can kick-start your gardening project on the right foot. So, go ahead, pick the perfect pallet, and let your green thumb do its magic!
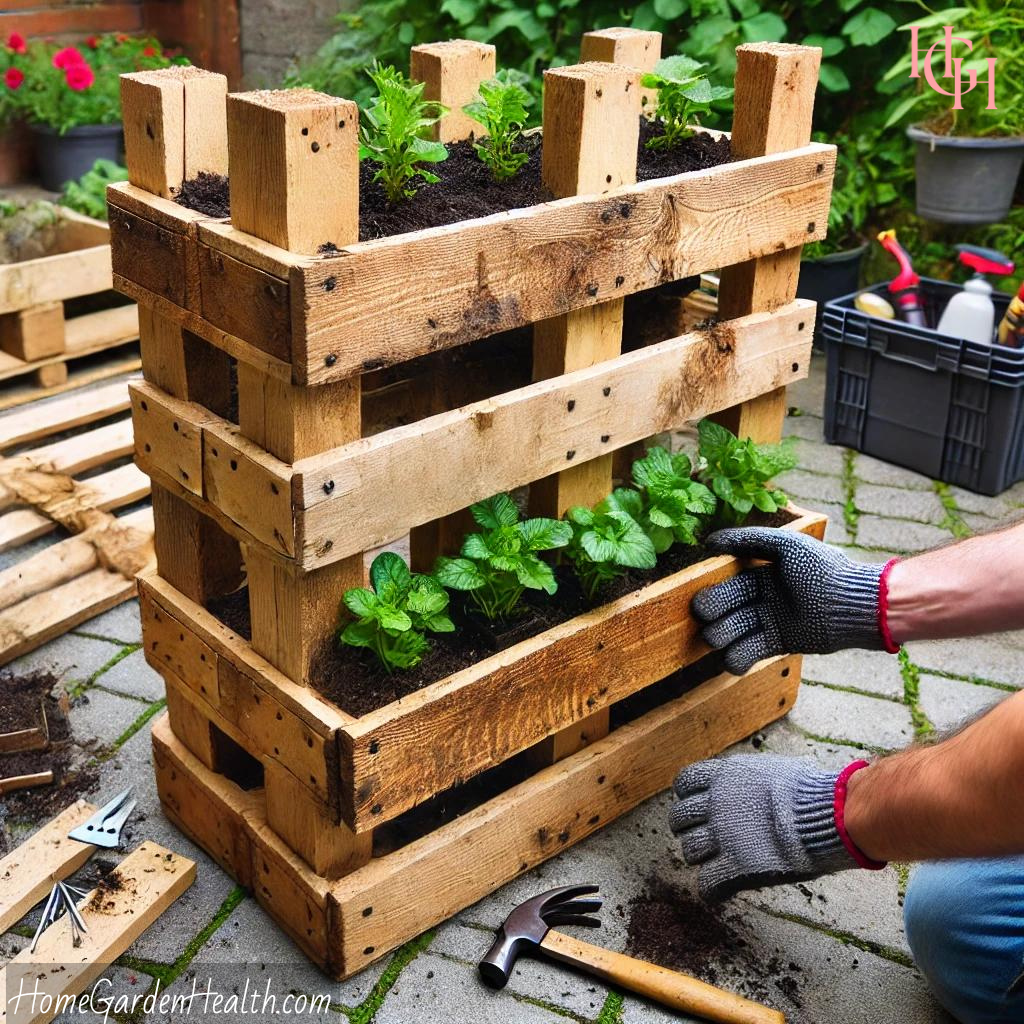
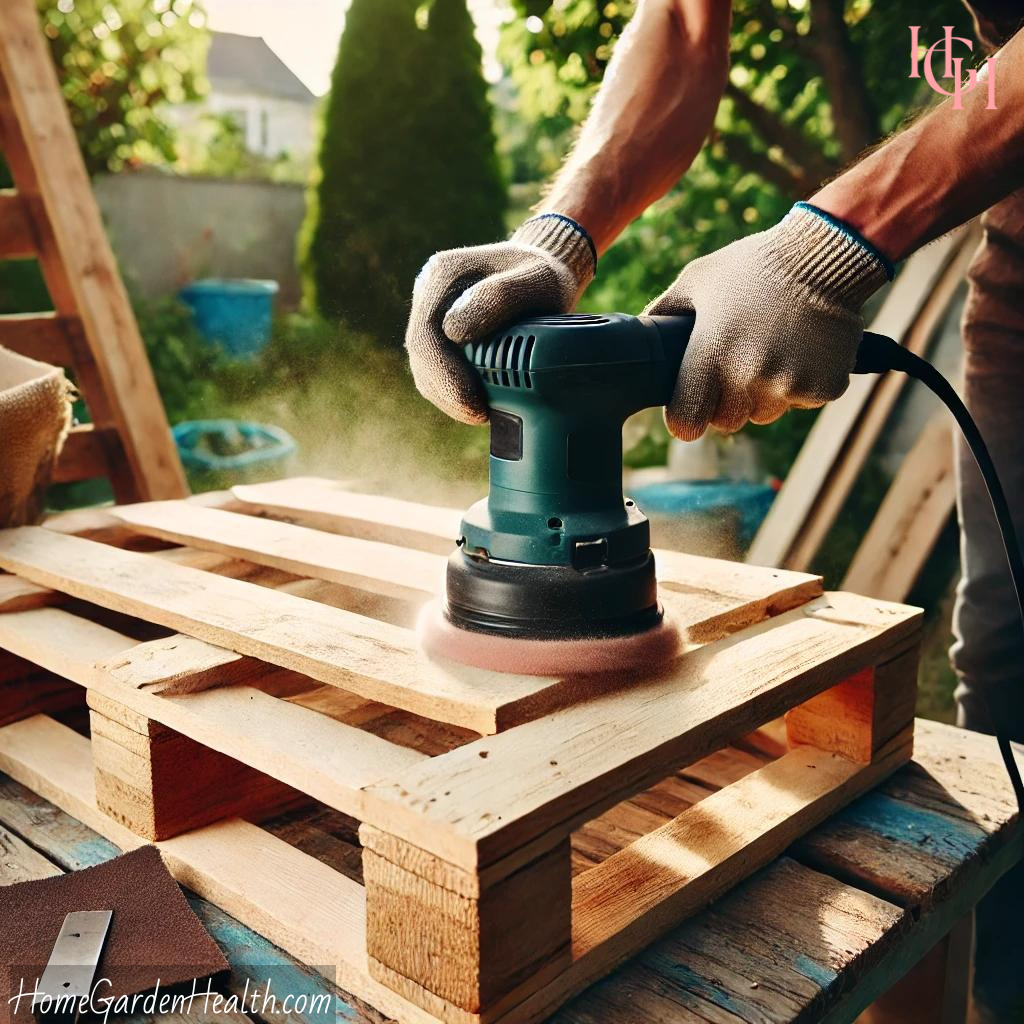
Step 2: Preparing and Sanding Your Pallet for Planting
If you’re looking for a unique and cost-effective way to showcase your plants, a DIY Vertical Pallet Planter is the perfect solution. Not only does it add a rustic and charming touch to your garden, but it also maximizes your space by allowing you to grow plants vertically. The first step in creating this planter is to find the right pallet and prepare it for planting.
Before you begin, make sure to choose a pallet that is in good condition and free of any harmful chemicals. Look for a pallet that has been heat-treated (marked with “HT”) rather than one that has been chemically treated (marked with “MB”). Once you have your pallet, the next step is to sand it down.
Sanding is an important step in the process as it helps to smooth out any rough edges or splinters that could potentially harm your plants. Start by using coarse-grit sandpaper to remove any stubborn stains or imperfections on the pallet. Then, switch to a medium-grit sandpaper to create a smoother surface. Finally, finish off with a fine-grit sandpaper to achieve a polished look.
Once you’ve completed the sanding process, give the pallet a thorough cleaning to remove any dust or debris. This will ensure that your plants have a clean and healthy environment to grow in. Now you’re ready to move on to the next step: painting or staining the pallet to add a pop of color or to enhance its natural beauty.
By following these simple steps and taking the time to properly prepare and sand your pallet, you’ll be well on your way to creating your own DIY Vertical Pallet Planter. Get creative with your planting choices and enjoy the beauty and functionality of your unique garden masterpiece. So roll up your sleeves and let your green thumb shine!
Step 3: Adding a Waterproof Layer to Your Pallet Planter
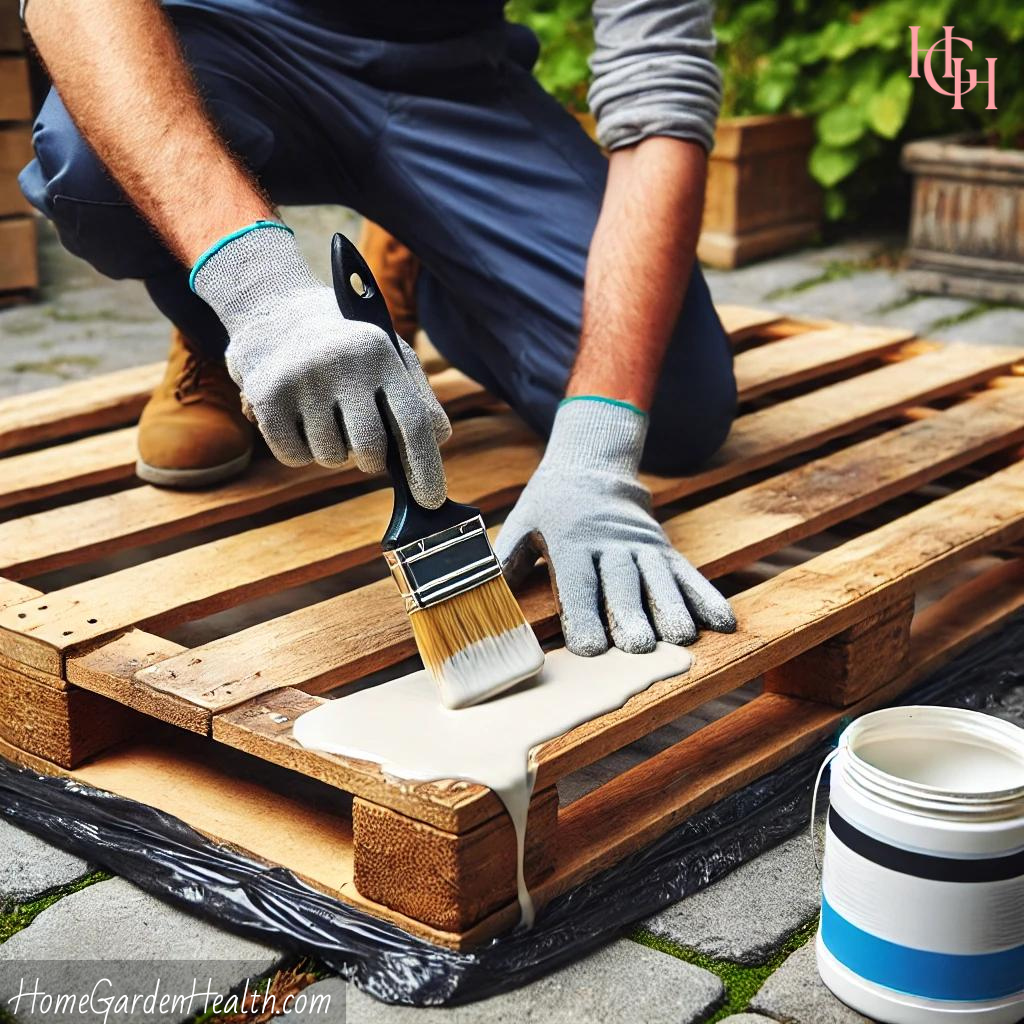
In the world of DIY gardening, creating a vertical pallet planter has become a popular and creative way to add greenery to your outdoor space. One crucial step in the process of building this planter is adding a waterproof layer to protect the wood and extend the lifespan of your creation. By applying a waterproofing sealant, you can ensure that your plants thrive and your planter stays in good condition for years to come.
Before you start, make sure the wood pallet is clean and dry. Remove any nails or protruding pieces that could damage the waterproof layer. Once the pallet is ready, select a waterproof sealant that is suitable for outdoor use. Look for sealants specifically designed for wood that provide UV protection and resistance against water damage.
Begin by applying the waterproof sealant to the exterior surfaces of the pallet. Use a brush or roller to evenly coat the wood, ensuring that the sealant reaches all the nooks and crannies. Pay close attention to the joints and corners, as these areas are more prone to water penetration. Allow the sealant to dry completely before moving on to the next step.
Next, apply the sealant to the interior of the pallet. Although this step might seem unnecessary, it is essential to prevent water from seeping through and damaging the wood over time. Be thorough in your application, covering every surface and leaving no areas unprotected. Once the sealant has dried, your pallet planter is now equipped with a robust waterproof layer.
Adding a waterproof layer to your DIY vertical pallet planter is a simple yet crucial step in ensuring the longevity and success of your gardening project. By taking the time to properly seal the wood, you can protect it from water damage and enjoy a beautiful and functional planter for years to come. So go ahead and get started on your pallet planter adventure – your plants will thank you!
Step 4: Installing the Vertical Pallet Planter on Your Wall
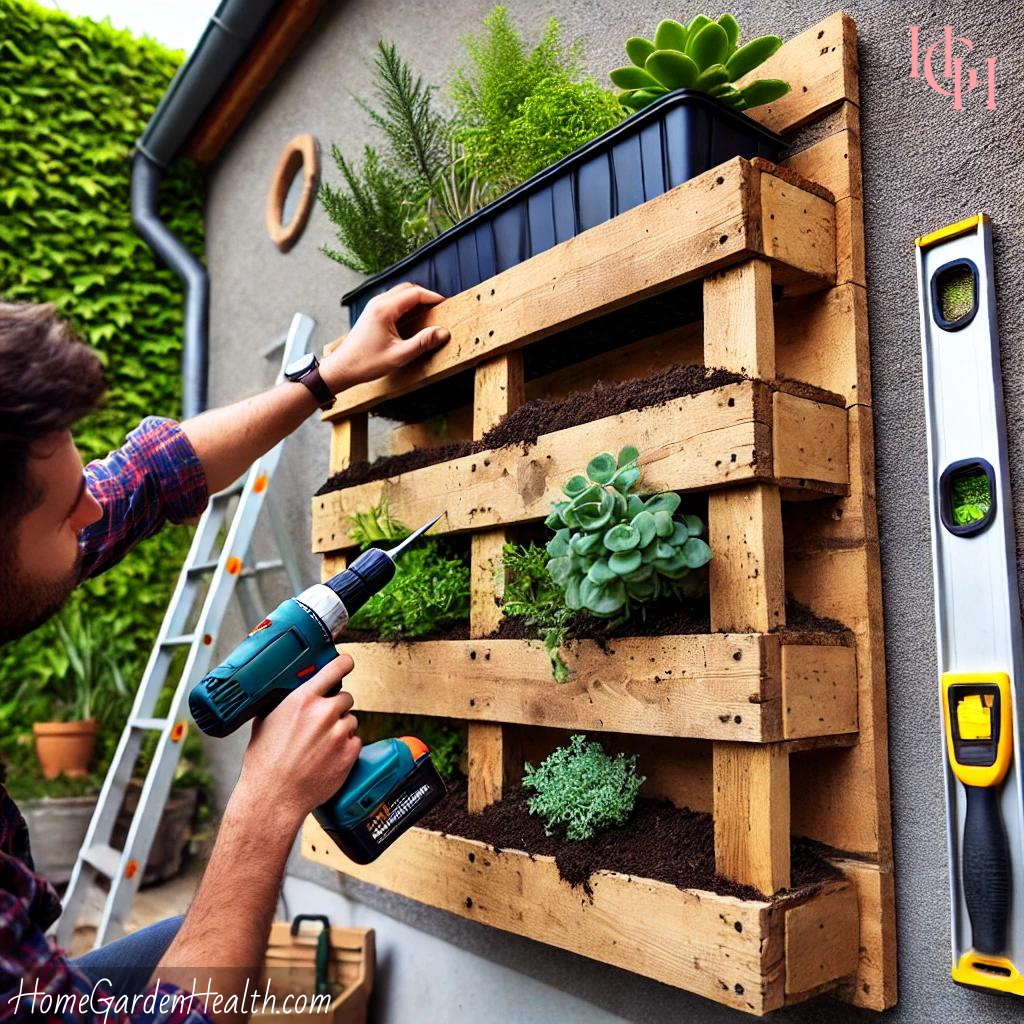
Once you have completed the construction of your DIY Vertical Pallet Planter, it’s time to install it on your wall. This step is crucial to ensure that your pallet planter is secure and stable, allowing your plants to grow and flourish without any worry.
Start by choosing a location on your wall that receives adequate sunlight and is easily accessible for watering and maintenance. Measure the height and width of your planter to determine the precise placement on the wall. It’s also important to consider the weight of the planter, especially when it’s filled with soil and plants.
Next, use a stud finder to locate the studs or support beams behind your wall. Mark these areas with a pencil to indicate where you will be installing the screws or hooks. This will provide additional support and prevent your planter from falling or causing damage to your wall.
Once you have marked the spots for installation, use a drill to insert screws or hooks securely into the studs. Ensure that they are aligned properly and protrude enough to hold the weight of the planter. Hang your pallet planter on these secure hooks or screws, making sure it is level and stable.
Congratulations! You have successfully installed your DIY Vertical Pallet Planter on your wall. Now it’s time to fill it with soil and your favorite plants. With proper care and maintenance, this unique and stylish planter will not only beautify your space but also provide a vertical oasis for your plants to thrive. Enjoy the beauty and benefits of having a vertical garden right in your own home!
Step 5: Planting Your Favorite Herbs and Flowers
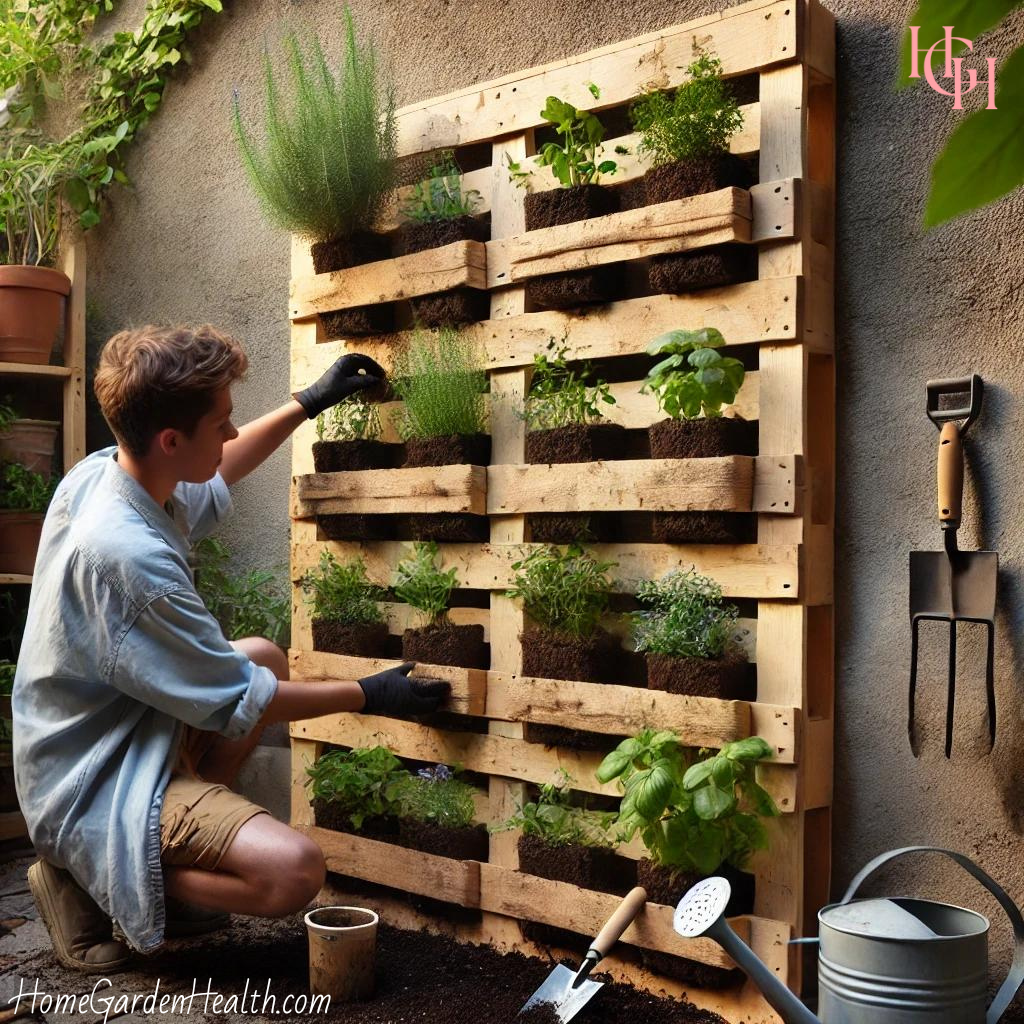
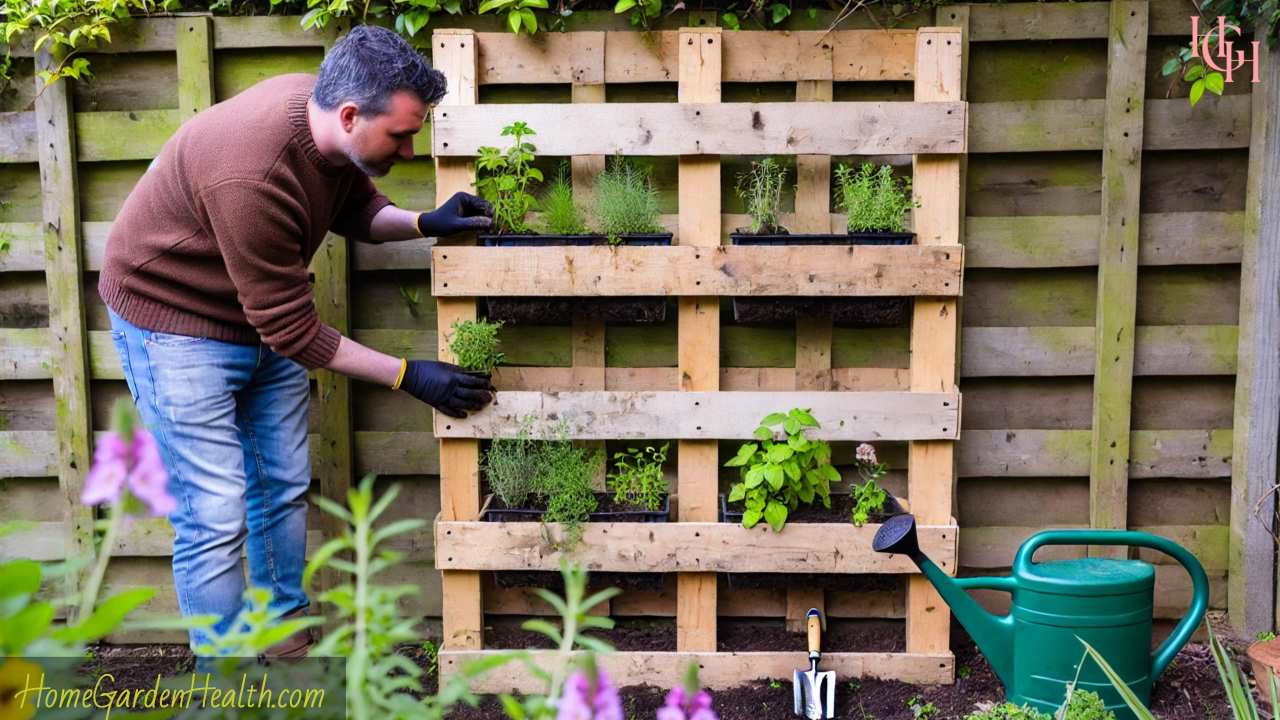
If you’re looking to add a touch of greenery and color to your space, planting your favorite herbs and flowers is a fantastic idea. Not only do they bring beauty and fragrance, but they also provide a fresh supply of herbs for cooking or medicinal purposes. And if you want to take it a step further and showcase your creativity, why not try a DIY Vertical Pallet Planter?
A vertical pallet planter is a great way to save space and make use of vertical walls or fences. It’s a simple project that can be done with just a few materials. First, start by finding a sturdy pallet and clean it thoroughly. Remove any loose or damaged slats, and sand down the surface to avoid splinters.
Next, choose the herbs and flowers you want to plant. Consider their sunlight and water requirements, and opt for a mix of colors and textures for a visually appealing display. When you’re ready to plant, line the pallet with landscaping fabric or sturdy plastic to prevent soil erosion and keep the plants in place.
Fill each section of the pallet with a good quality potting soil, making sure to leave enough space for the roots to grow. Nestle the plants into their designated spots, gently patting down the soil around them. Water them well, and place the pallet in a location that receives the right amount of sunlight for the plants you’ve chosen.
With a little care and regular watering, your DIY Vertical Pallet Planter will soon be bursting with life. The herbs and flowers will grow, creating a beautiful living wall that not only adds a touch of nature to your space but also provides a delightful aroma and fresh ingredients for your recipes. So why wait? Get your hands dirty and start planting your favorite herbs and flowers today!
Maintaining and Watering Your Vertical Pallet Planter
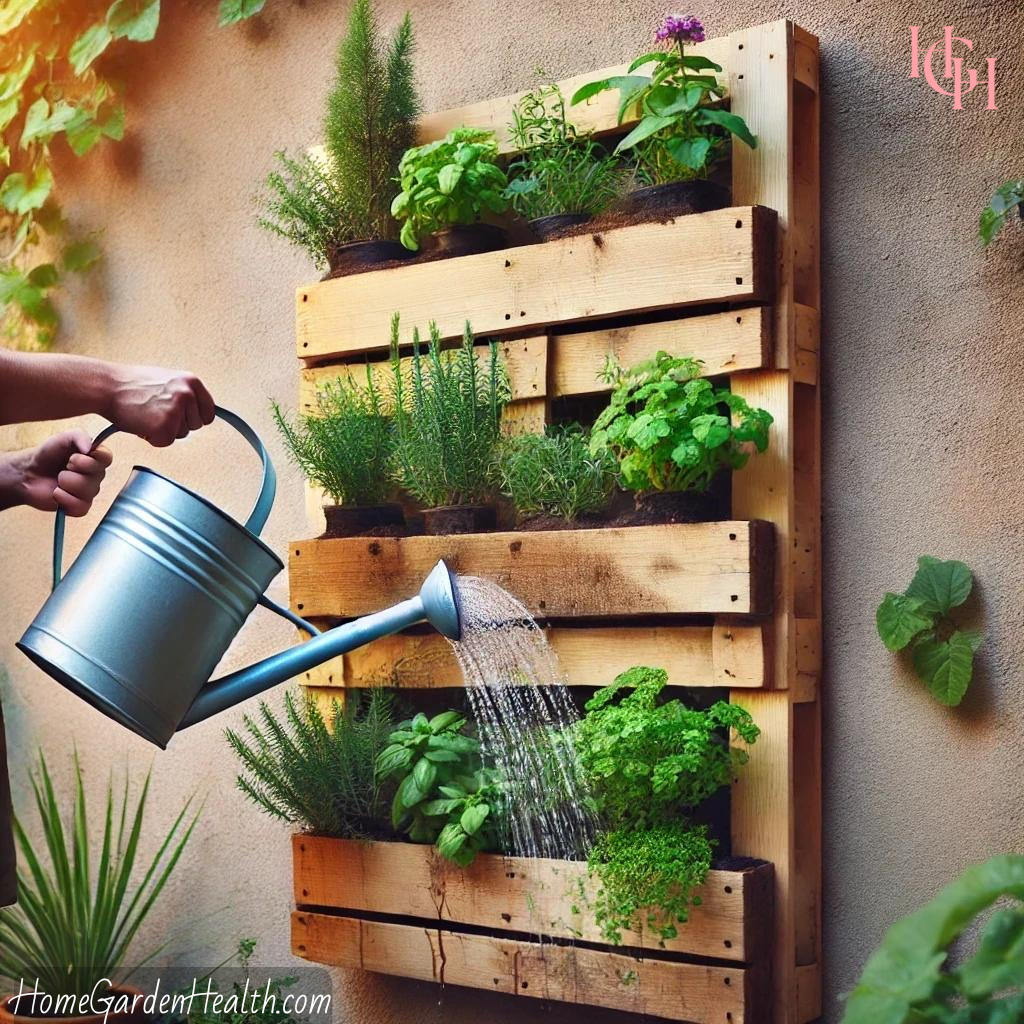
If you’re looking for a creative and space-saving way to grow plants in your garden, a DIY Vertical Pallet Planter is the perfect solution. These planters not only add a unique aesthetic to any outdoor space, but they also help maximize the use of vertical space, leaving more room for other gardening activities. However, once you’ve built your Vertical Pallet Planter, it’s important to know how to properly maintain and water it to ensure healthy and thriving plants.
The first step in maintaining your Vertical Pallet Planter is to regularly inspect it for any signs of wear and tear. Due to exposure to the elements, pallets may start to deteriorate over time. Make sure to fix any broken boards or reinforce weak areas to prevent your planter from collapsing. Additionally, check for any signs of pests or diseases, as these can quickly spread and harm your plants.
Proper watering is crucial for the health and growth of plants in your Vertical Pallet Planter. The design of these planters typically allows for drainage, but it’s important to avoid over-watering to prevent waterlogged roots. Stick your finger into the soil about an inch deep, and if it feels dry, it’s time to water. However, if it feels moist or wet, hold off on watering for a few days. Remember, different plants have different water requirements, so it’s essential to research and understand the needs of the specific plants you’re growing.
To prevent excessive evaporation and conserve water, consider adding a layer of mulch on top of the soil in your Vertical Pallet Planter. Mulch helps retain moisture and regulates soil temperature, promoting healthier root growth. Additionally, applying organic fertilizer regularly will provide essential nutrients to your plants and promote vibrant foliage and abundant blooms.
In conclusion, with proper maintenance and watering, your DIY Vertical Pallet Planter can become a thriving vertical garden and a beautiful addition to your outdoor space. Regular inspection, watering based on plant needs, and the addition of mulch and fertilizer are key to keeping your plants healthy and maximizing the potential of your pallet planter. So, get your green thumb ready and enjoy the joy of gardening with this innovative and space-saving planters.
Creative Ideas for Decorating Your Garden Wall with Vertical Planters
Decorating your garden wall with vertical planters is a creative and visually appealing way to bring life to your outdoor space. Not only does it transform an otherwise ordinary wall into a vibrant and lush backdrop, but it also adds a touch of personality and charm to your garden. One popular and cost-effective option is creating your own DIY vertical pallet planter.
Vertical pallet planters are an excellent choice for those looking to showcase their green thumbs while upcycling materials. To create your own, simply find an old wooden pallet, clean it thoroughly, and screw on some planters. You can use a variety of planters, such as tin cans or terracotta pots, and secure them with hooks or nails to the palette’s pockets. Fill each planter with soil and your favorite plants, ensuring sufficient drainage. Hang the pallet planter on your garden wall, and voila – you now have a stunning vertical garden.
Another creative idea for decorating your garden wall is using vertical pocket planters. These fabric or felt planters come with multiple pockets, perfect for growing a variety of herbs, flowers, or even succulents. Hang the pocket planters on your chosen wall and fill each pocket with soil and plants. The result is a beautiful cascading effect, visually pleasing and space-saving. Not only do vertical pocket planters add color and texture to your garden, but they also allow easy access and maintenance for growing and harvesting herbs or small vegetables.
If you’re feeling particularly adventurous, you can create a living wall by installing a vertical trellis system. This involves attaching a trellis to your garden wall, providing support for climbing plants. Choose plants like ivy, honeysuckle, or jasmine that can easily grow upwards. As the plants grow, they will create a natural tapestry effect, covering the wall with beautiful foliage and blooms. A living wall not only looks stunning but also acts as a natural privacy screen, making it an excellent option for smaller outdoor spaces.
When it comes to decorating your garden wall with vertical planters, there are countless possibilities. Whether you choose to create a DIY vertical pallet planter, use vertical pocket planters, or opt for a living wall with climbing plants, the end result will be a stunning and unique display of nature. So, let your creativity flourish, and transform your garden wall into a botanical masterpiece.
Enjoying the Fruits of Your Labor: Benefits of DIY Vertical Pallet Planters
If you’re someone who enjoys tinkering with plants and getting your hands dirty in the garden, then DIY vertical pallet planters might just be the perfect project for you. These innovative and creative planters allow you to maximize your vertical space and create a stunning display of plants in a compact and unique way. Not only are DIY vertical pallet planters fun to make, but they also offer a range of benefits that make them a worthwhile addition to any garden.
One of the primary benefits of DIY vertical pallet planters is their space-saving nature. Whether you have a small patio, a balcony, or even just a limited amount of outdoor space, these planters allow you to utilize vertical surfaces to grow a variety of plants. By utilizing vertical space, you can transform a blank wall or empty corner into a vibrant and lush garden, adding visual appeal to your outdoor space.
Additionally, DIY vertical pallet planters are a sustainable and eco-friendly choice. By repurposing old pallets, you are giving new life to materials that might have otherwise ended up in landfills. This not only reduces waste but also provides a cost-effective alternative to purchasing expensive planters. By using recycled materials, you can feel good about your environmental impact while enjoying the fruits of your labor.
Lastly, DIY vertical pallet planters offer a great deal of flexibility. You have the freedom to choose the size and design of your planters, allowing you to customize them to fit your specific needs. Whether you’re interested in growing herbs, flowers, or even small vegetables, these planters can be tailored to accommodate your desired plants. With just a little creativity and imagination, you can create a truly unique and personalized garden that reflects your style and taste.
In conclusion, DIY vertical pallet planters are a fantastic project for gardening enthusiasts. Not only do they maximize space and offer a sustainable choice, but they also allow for flexibility and customization. So, if you’re looking to enjoy the fruits of your labor and create an eye-catching garden, why not give DIY vertical pallet planters a try? With a little time and effort, you can transform your outdoor space into a beautiful oasis.